NCM Configuration
Motadata Network Configuration Manager (NCM) offers a simple, comprehensive and elegant solution for an easy Network Change and Configuration Management (NCCM). Network Configuration Manager can manage network devices such as switches, routers, firewalls, wireless access points, integrated access devices etc. from multiple vendors.
Introduction
What NCM Offers
Create and manage your network devices that stores the network configuration
Keep a track of all the NCM monitors
Automatic and manual backup of the device configurations on a regular interval
Manage start up and running configurations
Create a baseline backup to revert the configuration if required
Revert back the NCM changes in case of failure
Line by line comparison of backup and new configuration on devices
Upgrade configuration on multiple devices at same time through Motadata
Working in the NCM monitor using Motadata remote.
Journal entry of each activity someone do on network devices
Prerequisites
Plugins: SSH NCM Collector, Telnet NCM Collector
NCM engine should be ON from the backend
Monitor Discovery: NCM monitors should be discovered from admin section.
NCM will discover only those SNMP devices that allow remote configuration
In ncm-conf.yml (backend), provide your system IP.
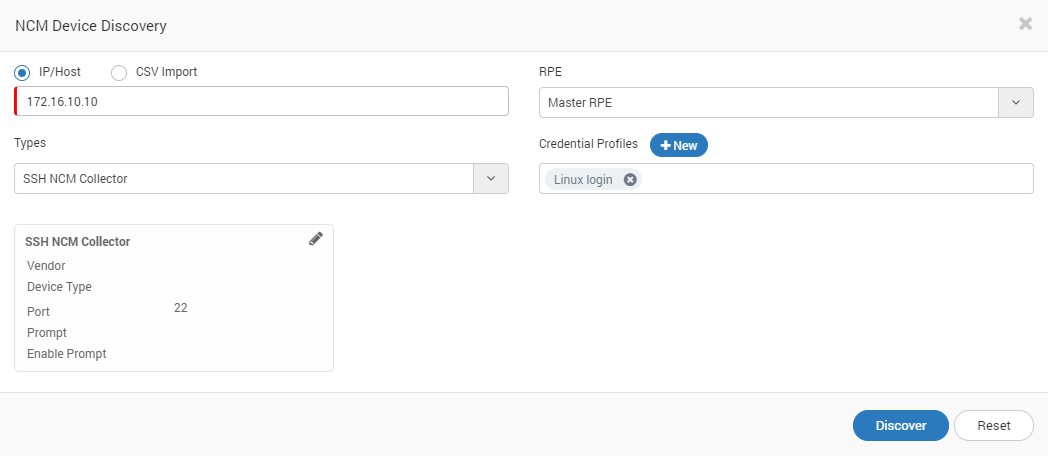
Discover NCM Devices
Motadata scans your network to identify all the NCM devices and monitor them in its system. The discovery of devices is a four step process.
Create Credentials Profile: Here you will provide the access details of the NCM devices that you want to monitor. Motadata will use these credentials for authentication and fetching data from devices.
Create Discovery Profile: Here you will provide the IP address and other parameters to identify the NCM devices in the network. When devices are found, Motadata will use credential profile to authenticate those devices.
Run Device Discovery: Here Motadata actually scans your network and identify all the NCM devices using discovery and credentials profile. As a result, it will show you all the devices found by Motadata.
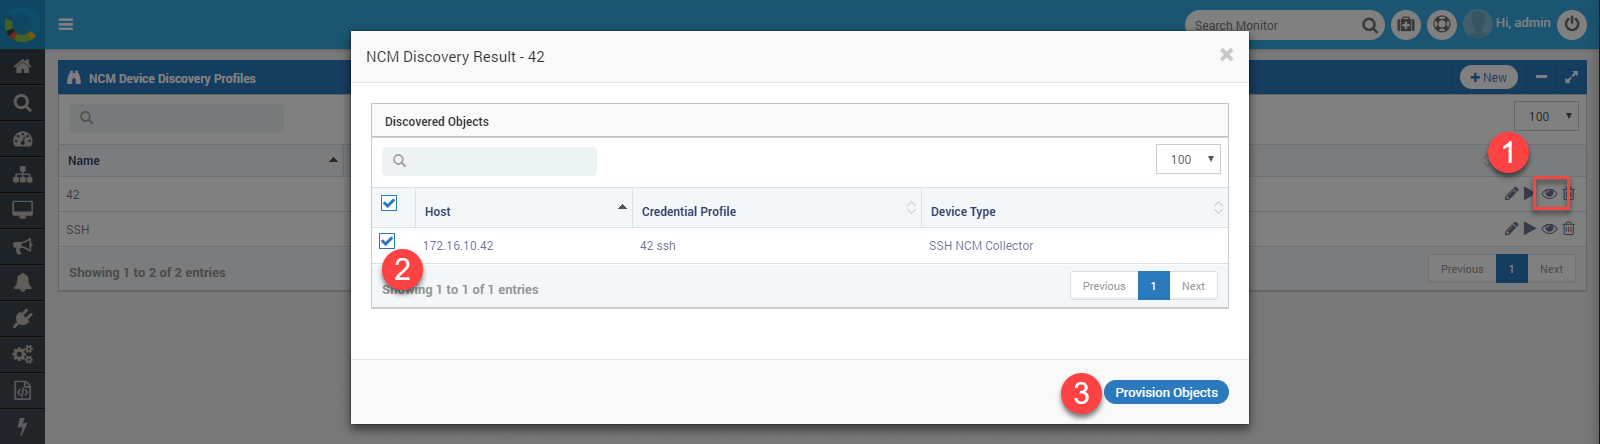
Provision NCM Devices: Here you select the devices that you want to manage using Motadata (from all the discovered devices). Motadata will take care of only the provisioned devices and ignore other non-useful devices.
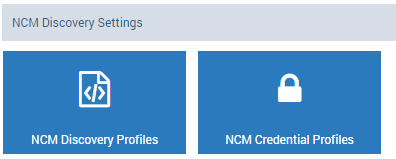
NCM Discovery Settings
Create NCM Credential Profile
The credential profile contains the security parameters to authenticate the access of Motadata to the device. You can create a credential profile first and use it with a device type later. Also, you can also create a new credential profile while creating the discovery profile. There is no difference.

NCM Credential Profiles
Navigate to Admin > (Under NCM Discovery Settings) > NCM Credential Profiles.
Click on
+Newbutton to create a new profile or click on the to edit the existing profile. A popup will show to fill the required details.Fill the form.
Click on
Createbutton.
Note: Please type the credentials by hand. DO NOT Copy Paste.
Fields |
Description |
Name |
Display name of the credential. You can identify this credential profile using this name. |
Type |
Select the type: SSH or Telnet. |
Username |
Type the username required for login. |
Password |
Type the password required for login. |
Enable Username |
(If your device requires) Provide username for ‘enable’ command. |
Enable Password |
(If your device requires) Provide password for ‘enable’ command. |
Config Password |
(If your device requires) Provide config password. |
IP/HOST |
Provide IP to test the credentials before creating the profile. |
RPE |
Select the RPE that should look into your device. |
Port |
Select the port to test the device. |
Test Credentials |
Click on this button to test. Motadata will use username and password (required to login into NCM Device using IP and port your provided for testing. |
Department |
Select the department and people of that department can see/use this profile. |
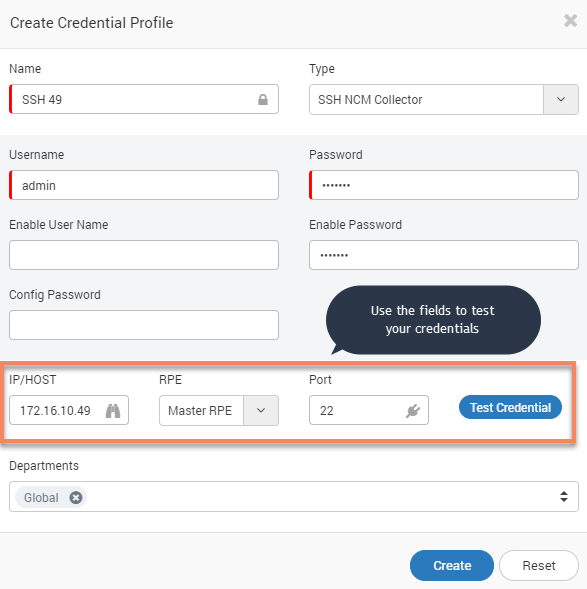
Create Credential Profile for NCM
Create NCM Discovery Profile
Discovery profile contains information about the NCM devices that should be discovered. The page shows you all the NCM discovery profiles. Motadata communicates with NCM devices in your network using these discovery profile.

NCM Discovery Profiles
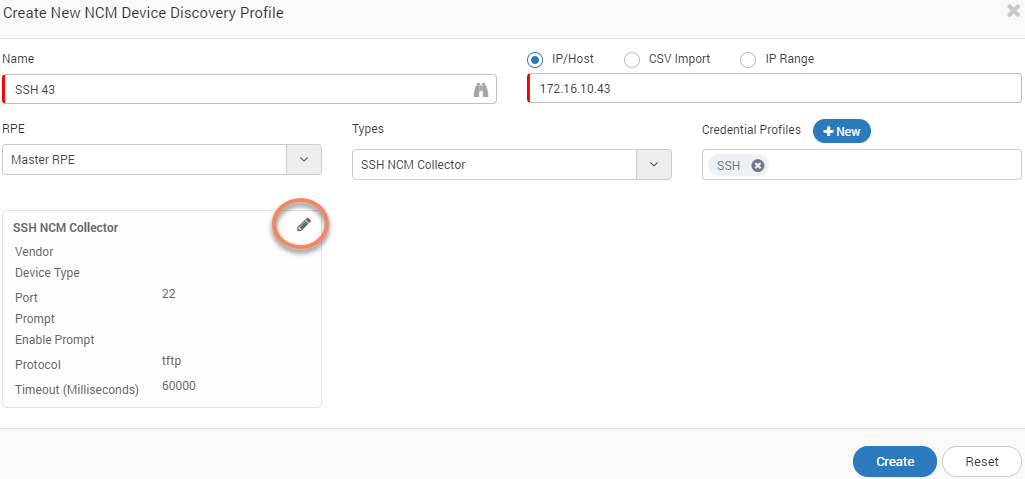
Create New Profile
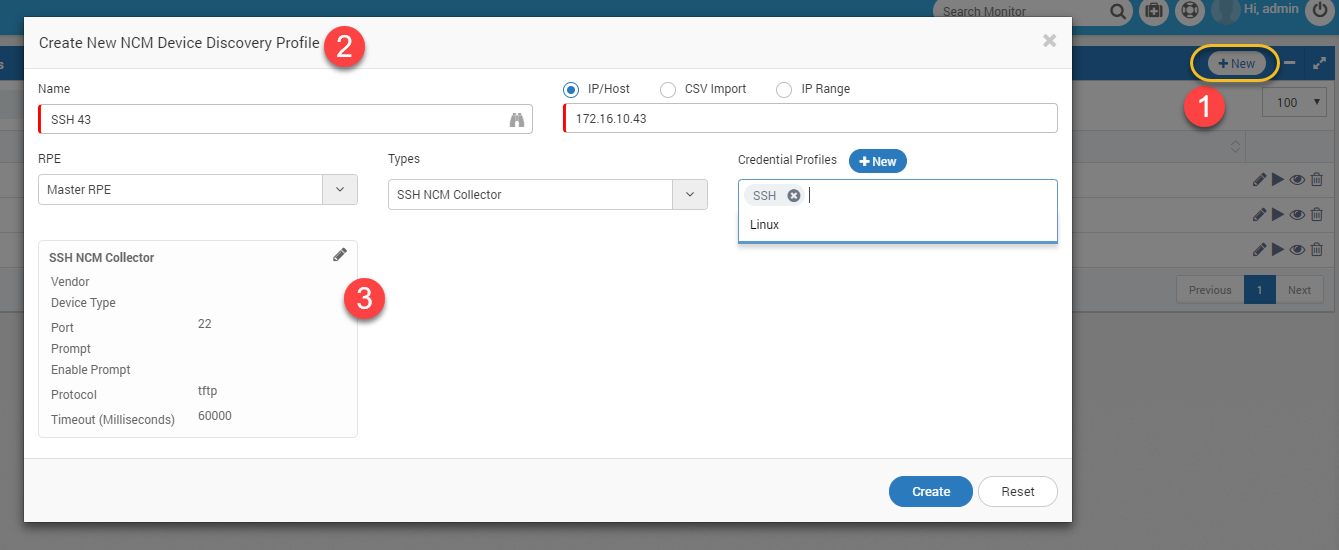
Create New NCM Device Discovery
Go to NCM > Devices.
Click on the
+Devicebutton. A popup will open to create a new device discovery.Provide the appropriate applicable details to discover an NCM device. The NCM device discovery option uses two methods: IP/HOST for single device, CSV Import for more than one devices and IP Range for a range of devices.
Create Device Discovery Profile
Fields |
Description |
Name |
The name is used to identify the discovery profile |
|
|
RPE |
It is useful when system is deployed in distributed mode. Choose the RPE from which you want to discover and poll monitors. By default, ‘Master RPE’ is selected. |
Types |
Shows the list of NCM types supported in system. Currently 2 NCM types are supported: Telnet and SSH |
Credential Profiles |
Select the credential profiles created in previous section. If not created, then create from here. See previous section for steps of creating a credential profile. |
Collector Parameters |
Define the NCM collector settings. These settings are used to gain access of NCM terminal. |
** Note: Use the following format to create CSV. Do not use column titles in CSV. The first column is reserved for IP addresses. Second column is reserved for the monitor name. All columns after that will be ignored.
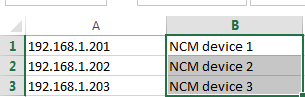
NCM Discovery - CSV Format
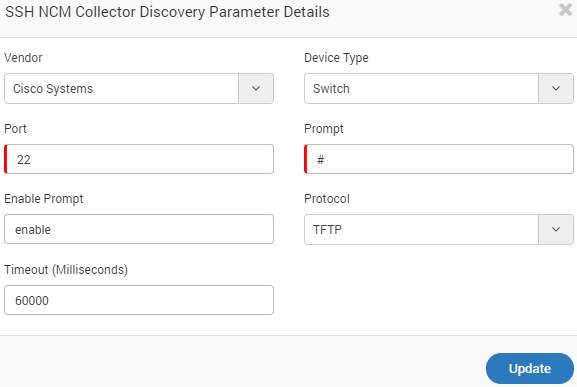
NCM Collector Settings
Vendor |
Provide the name of the NCM device vendor |
Device Type |
Select the type of device:
|
Port |
Provide the port address of the NCM device |
Prompt |
Provide the type of prompt. It is generally either: ‘#’ or ‘>’ |
Enable Prompt |
Provide the keyword to enable the prompt |
Protocol |
Select the communication protocol to communicate with device |
Timeout (Milliseconds) |
Select the numeric value for timeout. Default: 60000 ms |
Edit the NCM Collector. The drop down to select Types is not available on edit popup.
Edit NCM Collector
Once you complete creating the profile, Motadata will ask you if you want to run a discovery. You can also run a discovery for existing NCM profiles.
Run Discovery Profile
Run discover profile finds the devices in the network based on the profile settings. To run a discovery profile:
Go to Admin > NCM Discovery Profiles.
On the right hand side of profile, click run. A dialog box will appear for confirmation, Select ‘Yes’.
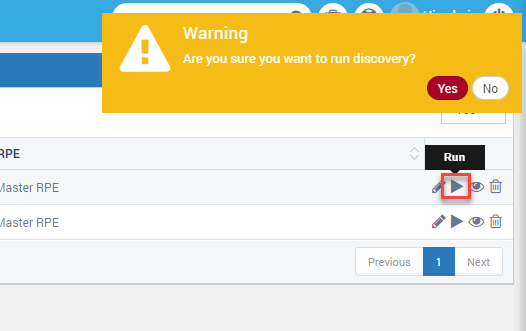
Run Discovery
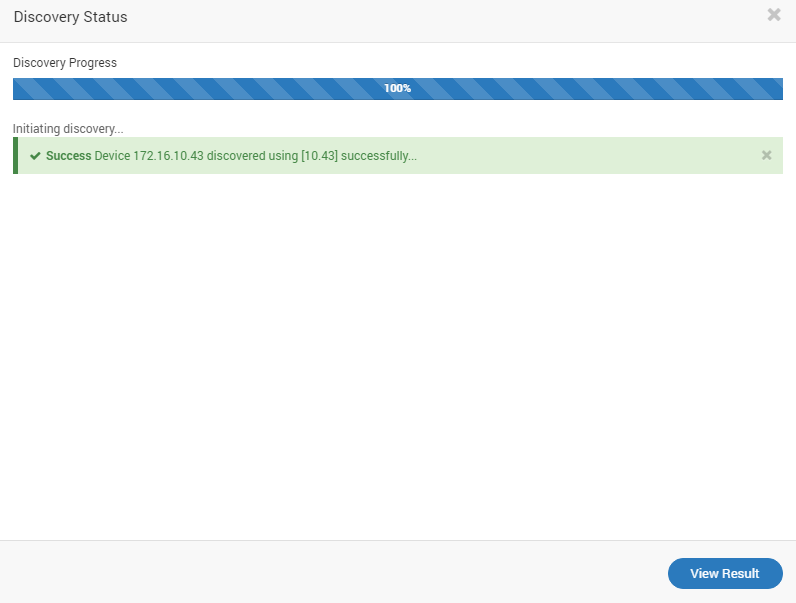
Discovery Status
Click on ‘View Result’
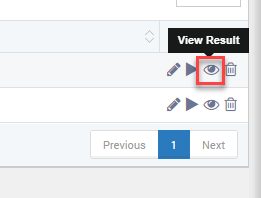
View Discovery Result
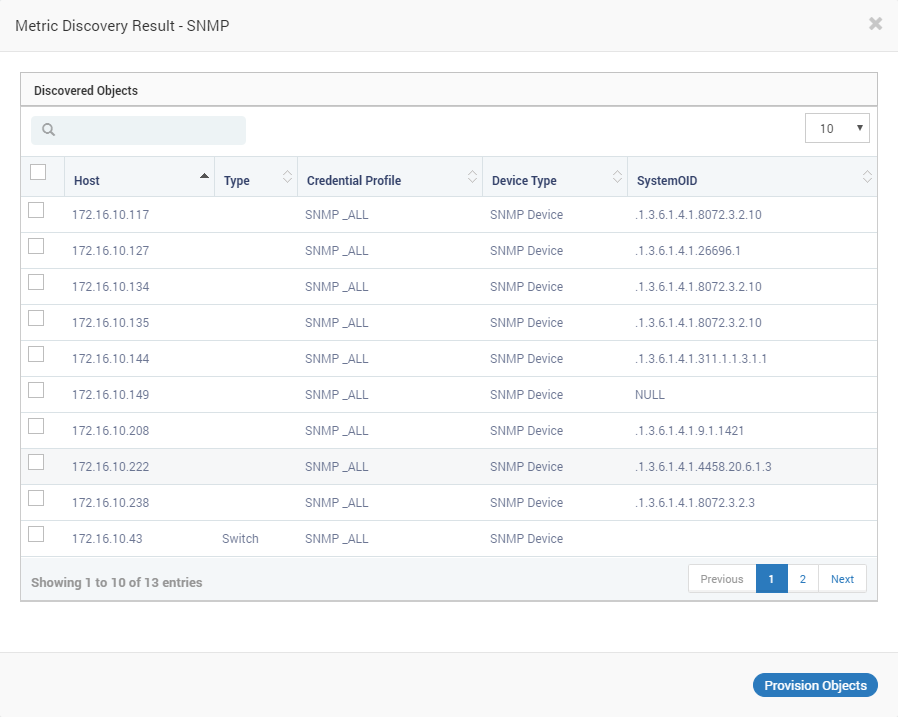
NCM Discovery Results
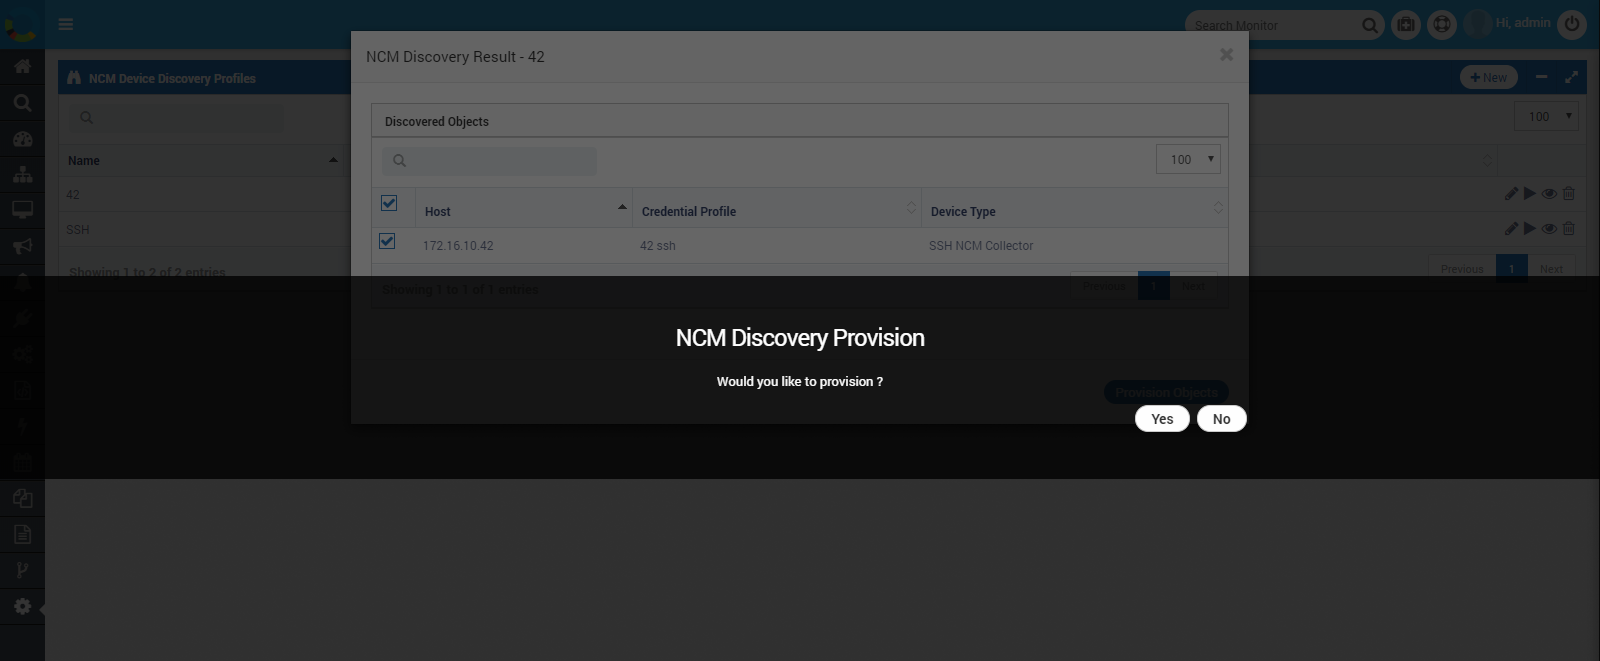

NCM Devices
You will see all the provisioned NCM devices in NCM menu. To see devices go to NCM > Devices tab:
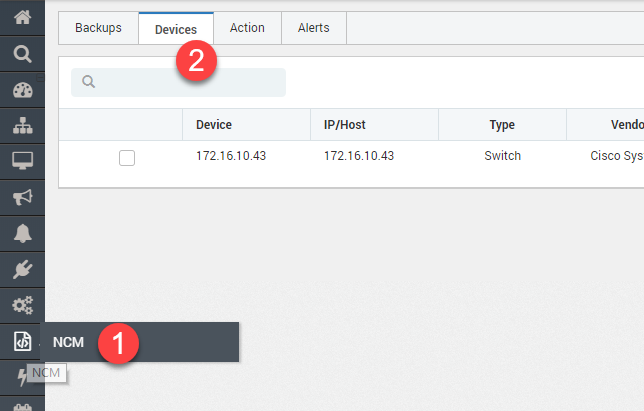
NCM Devices List
The list page provides options to perform various operations on NCM devices. Some actions can be performed on individual devices while some actions are available for bulk devices.
Edit NCM Devices
Edit button is available as an individual action to change the SNMP device details. The option is available in right side of NCM device list.

Edit NCM Device
Click on the edit button and you’ll see a popup to update the details about the device. Here you can change the basic details, credential profile and NCM collector section.
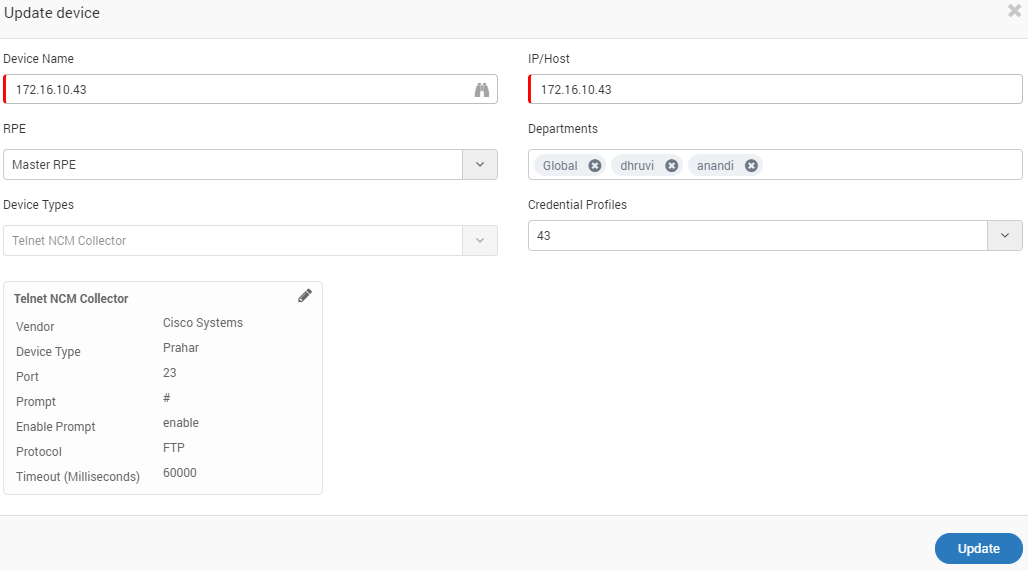
Edit NCM Device
You can also edit the device from admin section. Go to Admin > NCM Discovery Settings > NCM Discovery Profiles.
Disable NCM Device
When you don’t need to monitor/use the device, disable the device using disable button. You can disable individual device or multiple devices also. To disable multiple devices, first select the devices using checkbox button (on left hand side) and disable from Action menu (top right corner).

Disable NCM Device
Enable NCM Device
You can enable the disabled NCM devices using enable button. You can enable device or multiple devices also. To enable multiple devices, first tick checkbox of devices and then enable from Action menu.

Enable NCM Device
Delete NCM Device
You can delete the NCM devices using delete button. The devices once deleted cannot be restored. You require to add a new device. You can delete one device or multiple devices also.

Delete NCM Device
Open Terminal
You can connect to the NCM device’s terminal from Motadata GUI and run the commands directly. This will remove the dependency of third-party tools to connect with your NCM device. The terminal has following properties:
You need valid credentials to access the NCM device.
When you refresh the page or close the terminal, the connection with NCM device is closed.
There is no difference between using GUI based terminal or running the command directly on the NCM machine.
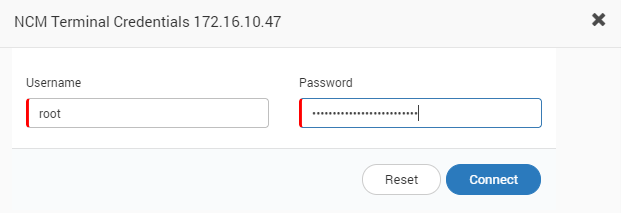
Authentication to Access Device’s Terminal
Username |
Username to access the terminal |
Password |
Password to access the terminal |
On successful authentication, you’ll see the terminal.
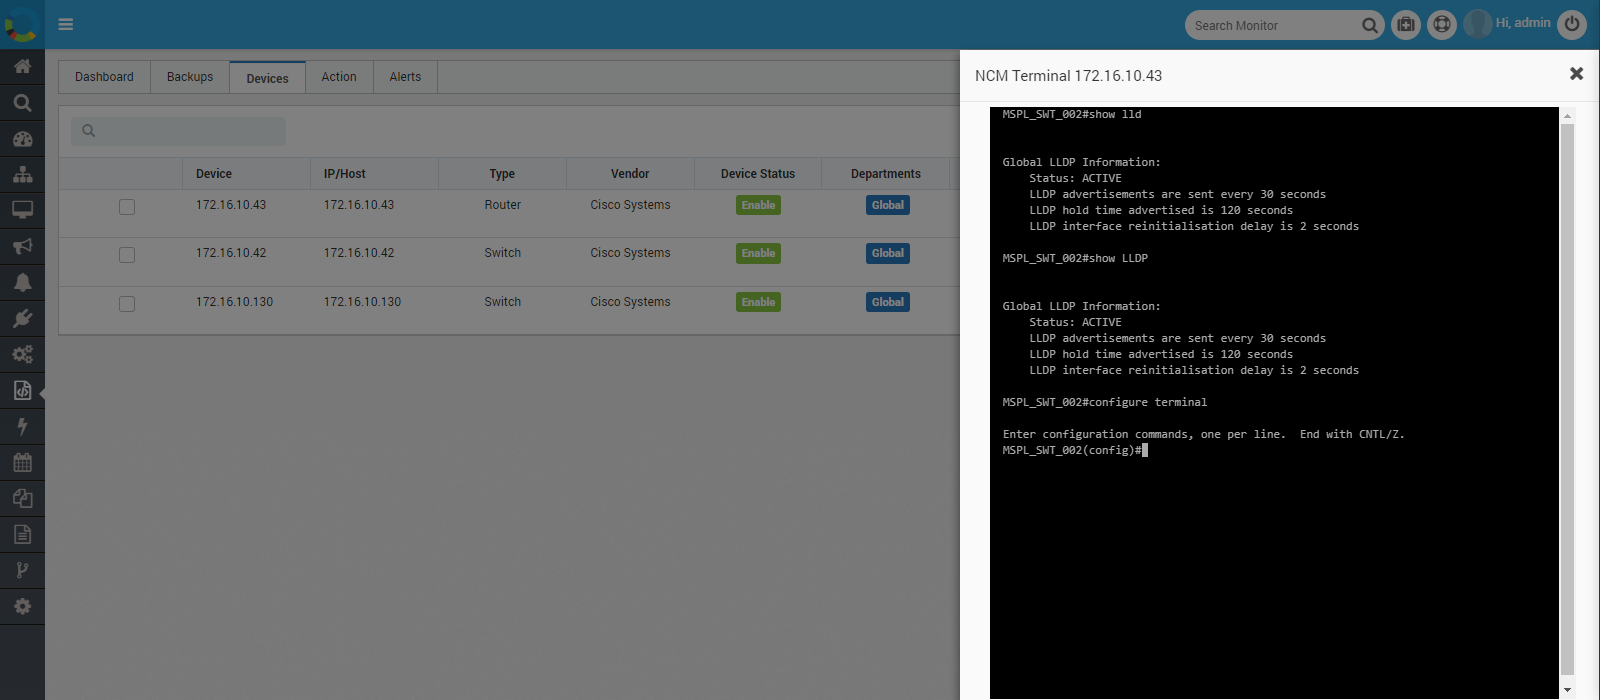
GUI Based Terminal for NCM Device
Backup NCM Devices
After adding devices, the first operation that should be performed is backing up the device configuration. You can create backup of devices using backup button. You can take backup of an individual monitor or a group of monitors. Select the devices for which you want to create a backup and select ‘Backup’ from ‘Action’ menu.
Note that During backup if the configuration settings in device is exactly same as the last backup, motadata will not create another backup. It will simply update the timestamp of existing backup. But if the configuration do not match with the backup, motadata will create a new version of backup.

Create backup for NCM Device
Take Manual Backup
You’ll see a menu to configure the backup schedule.

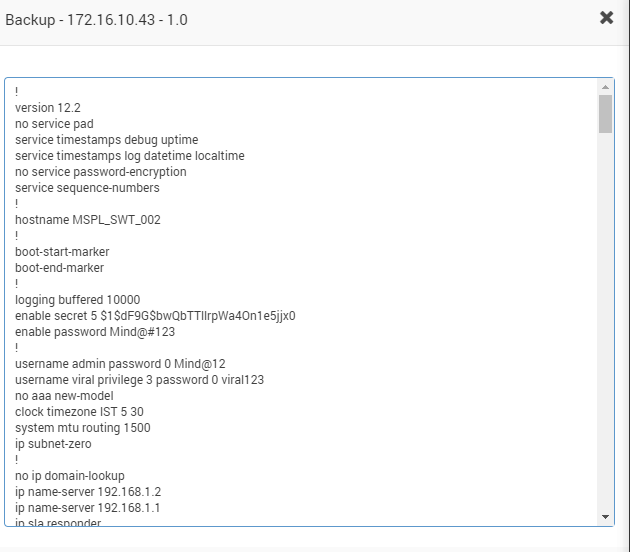
Backup Start and Running Configuration
Select the NCM device and choose either of two options: Execute Action or Schedule Action
Execute Action: Click the Execute Action button to run the backup instantaneously.
Schedule Action: Click the Schedule Action button to schedule the backups.

Schedule Backup Jobs
Provide the name of the scheduler.
Select time of the schedule.
For scheduling job at specific time, turn on ‘Repeat this job’ and configure the repeat schedule.
Compare Backup
Set the two backups using CTRL button to compare the changes in the new backup file and baseline backup file.
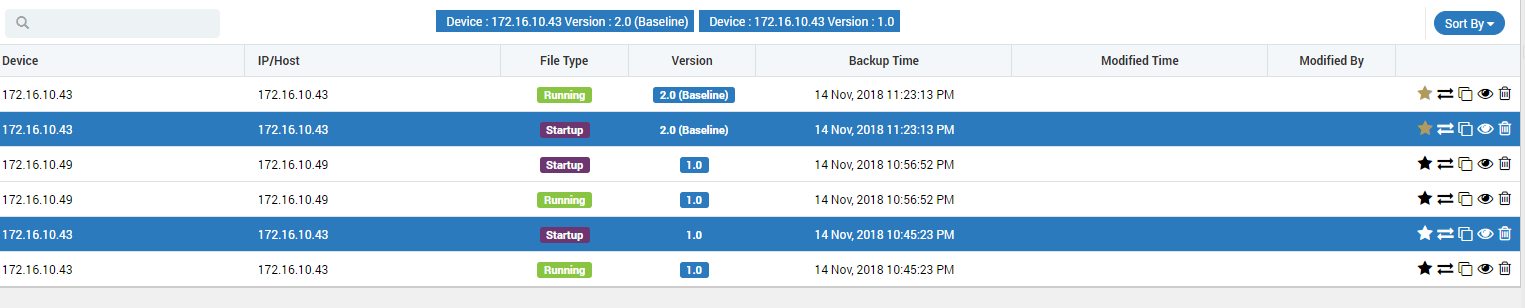
Set Backups to Compare
The configuration difference is depicted side-by-side showing the changed lines in yellow, added lines in green and deleted lines in red. Configurations are versioned and stored in the database and the Network Configuration Manager GUI provides option to select and view any particular configuration version. From the historical information, administrators can choose any to configuration versions and compare.
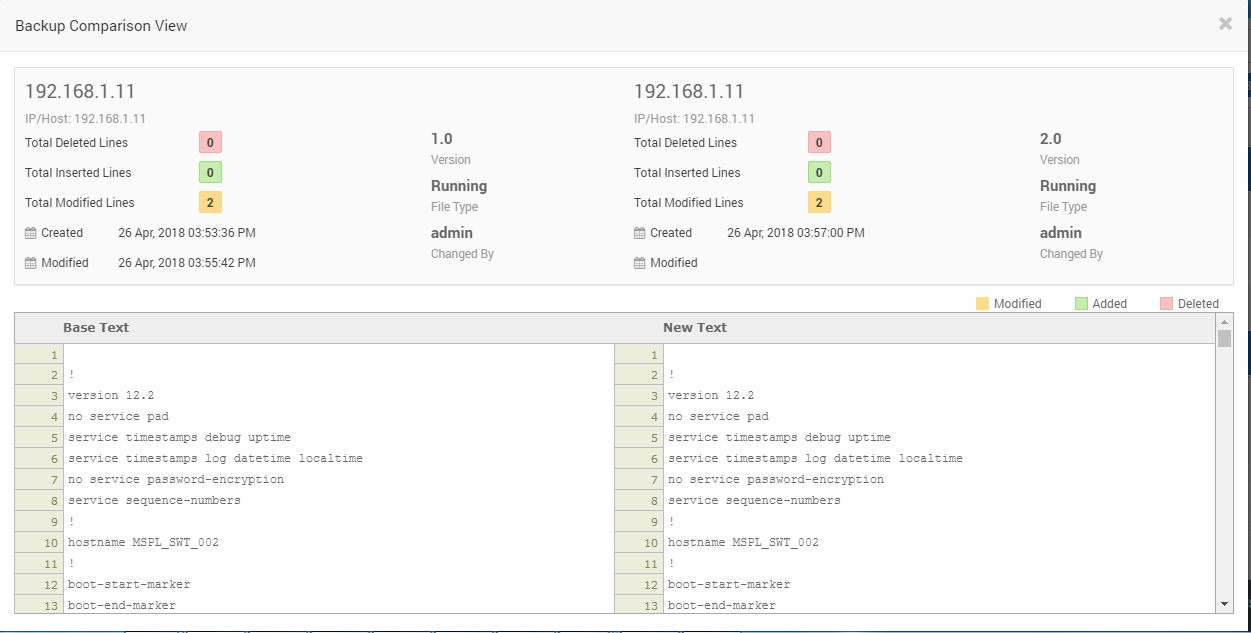
Compare Backup Files
Restore Backup
Click on the restore backup to restore the backup from baseline backup. System will show a popup with all the NCM devices available in the system. Select the devices on which you want to restore the backup.
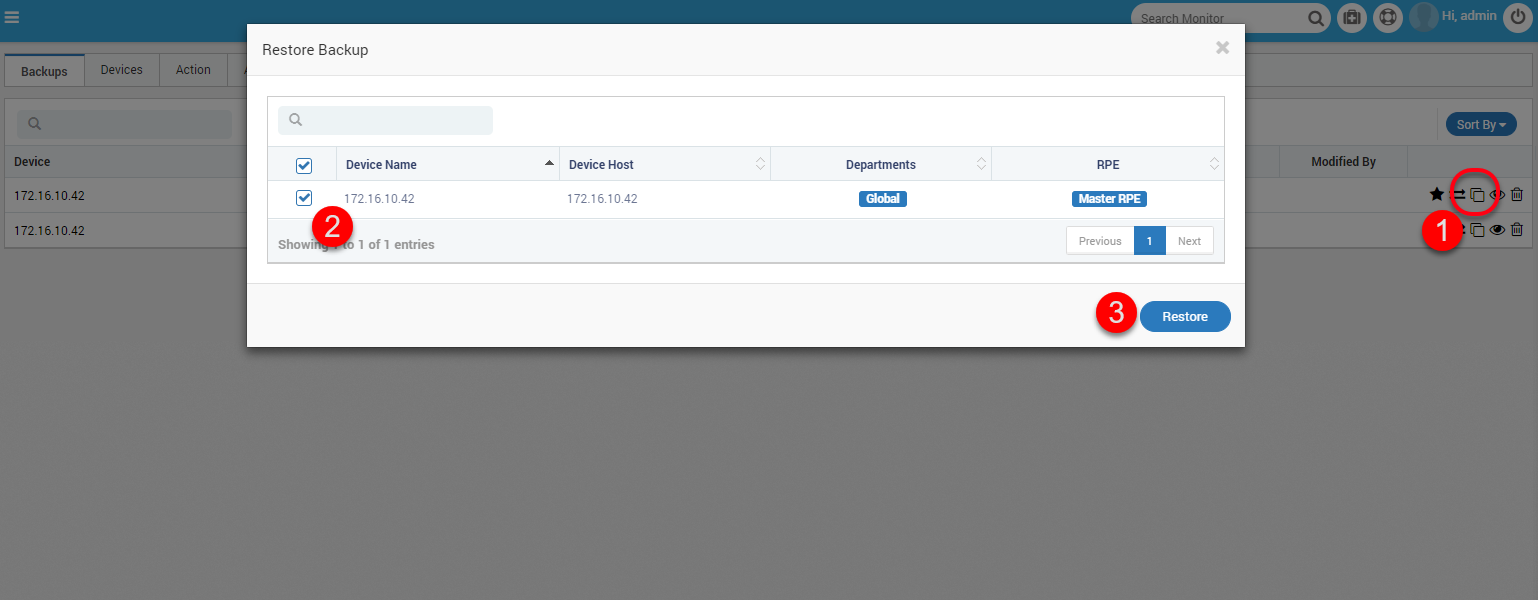
Restore Backup
Delete Backup
Select the delete button to delete the backup. This will permanently remove the entry from the system.
NCM Configuration Actions
Actions in the NCM devices are nothing but the set of commands by which you update their configuration. For cisco devices, Motadata gives you some common commands that you can directly use and run in devices. For other devices, you can either create a new action (set of commands) or import from outside.
Important!! A wrong action/command can lead to network failure. Please use this menu under expert supervision.
Execute Actions on NCM Devices
Click on the button to run an action. A slider will open with all the list of commands to execute the action.
Change the commands/values as required.
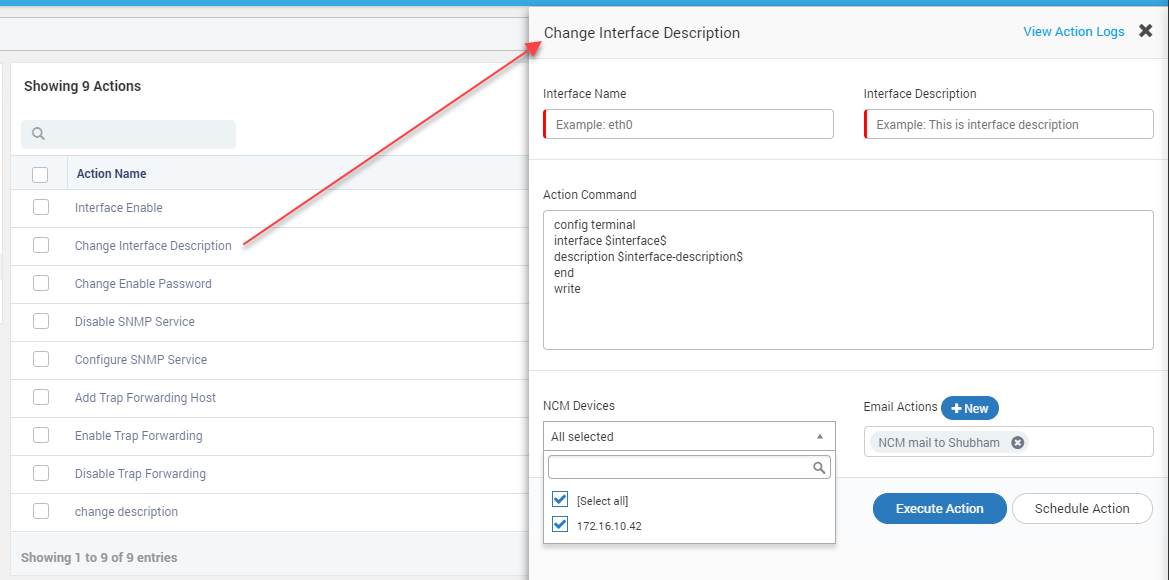
Commands that are executed to perform action
Select the NCM devices on which the command should be executed.
Click on Execute Action or Schedule Action
Execute Action: Click the Execute Action button to run the backup instantaneously.
Schedule Action: Click the Schedule Action button to schedule the backups.
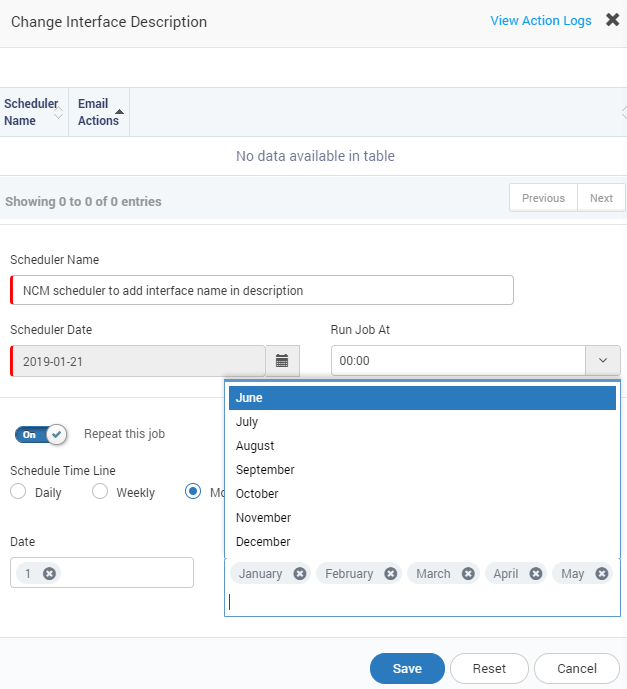
Schedule Configuration Jobs
Provide the name of the scheduler.
Select time of the schedule.
For scheduling job at specific time, turn on ‘Repeat this job’ and configure the repeat schedule.
Note: The scheduler name and email at the top shows the list of existing schedulers for this action. For a new scheduler it is blank. But if there are existing schedulers running for the action, you’ll see it there.
Benefits of this Feature
You don’t need to login into each device and do any action.
All your action commands are safe and secured in Motadata.
You can change configuration of more than one devices in single go.
Motadata automatically takes a backup before and after doing any action.
Simple hierarchical structure to store and manage your actions.
Perform Actions on NCM
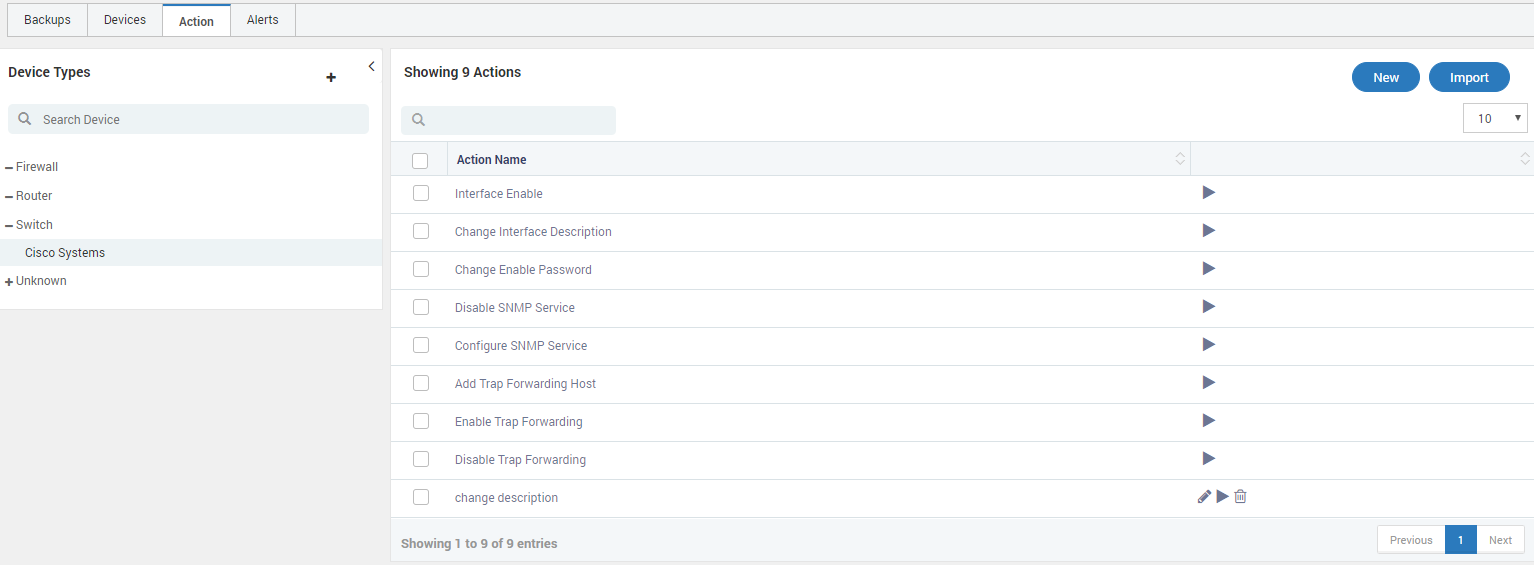
Default Actions: Motadata has some actions as default for the cisco switch. You’ll need to put only necessary configuration values to change the configuration.
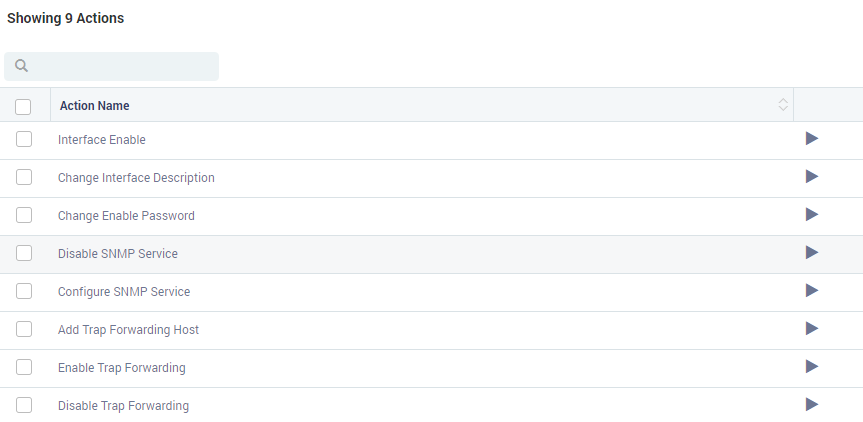
Default Actions
New Actions: Click on the New button to create a new action. A popup will open for you to fill details. Upon completion, the action will be visible in actions list of selected device type.
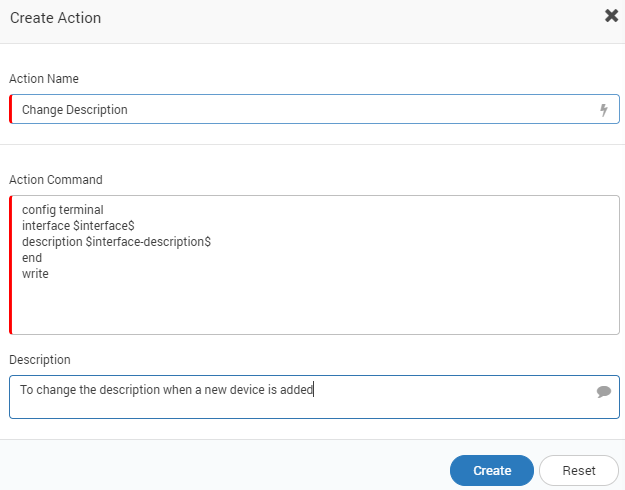
Create New Action
Import Actions: To import an action from your local machine, click on the import button. A popup will appear for you to import the files. Here you should import the YML files. System will read the files to create ‘Action Command’ from YML. The maximum file size you can upload is 100 MB. The imported file will appear in actions list of selected device type.
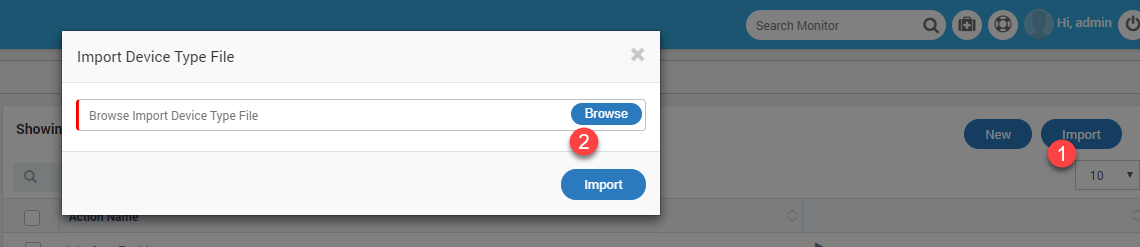
Import Actions
Device Types: Device type is the category under which actions on the right side are displayed.
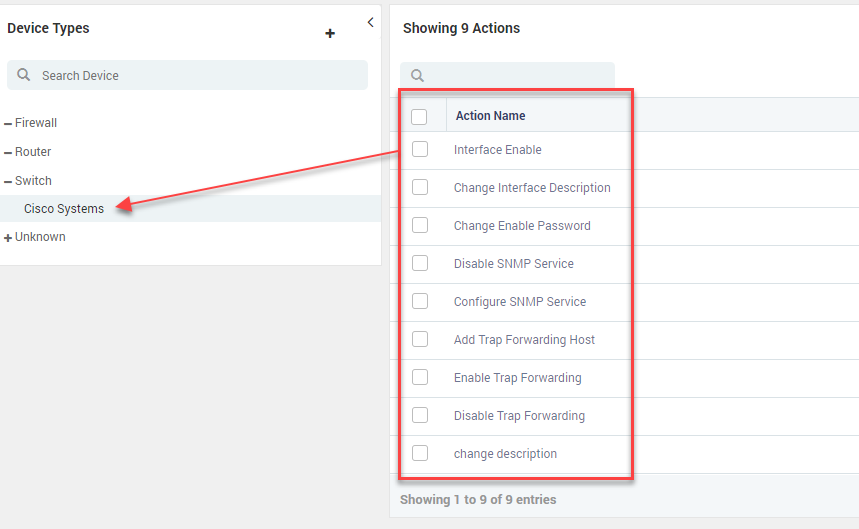
List of Device Types
You can also create new device types for your network devices. Click on the + button. A popup will open to fill the details.
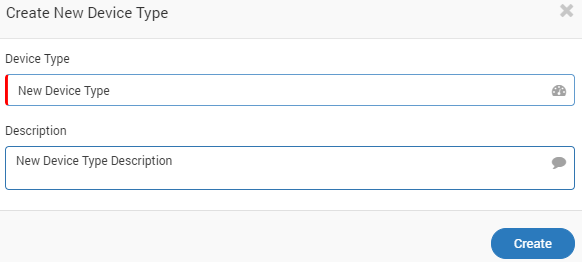
Create New Device Type
Alert (Journal Entry)
The page shows the alerts/logs of the NCM devices for each operation. You can also search logs, filters alerts based on operation type and audit status. The operations include:
When a new backup is taken
When an action is performed on the monitor
When a backup is restored
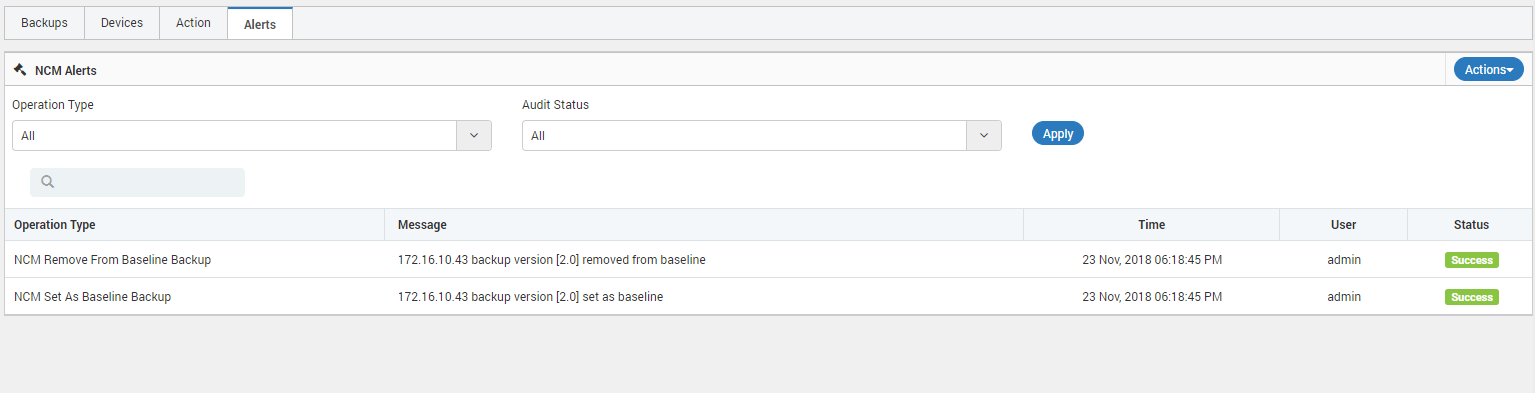
View Logs/Alerts
Column Description
Operation Type |
Name of the activity type. There are total _ types of activities available. |
Message |
Information of the activity in NCM devices |
Time |
Date time stamp of the activity |
User |
Name of the user who performed the activity |
Status |
Status of the activity (Success/Fail) |
Actions: From the actions you can:
Change the time span. Available time spans are: Last hour, This hour, Last 6 hours, Last 12 hours, Last 24 hours (default), Today, This week, This month, This year, Last Day, Last week, Last month, Last year, Previous hour, Previous day, Previous week, Previous month, Previous year
Export the alerts to an excel file.
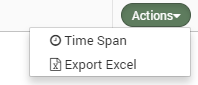
Actions Menu